Steps to Make Speedy Vietnamese caramel pork with pineapple

Steps to Make Speedy Vietnamese caramel pork with pineapple

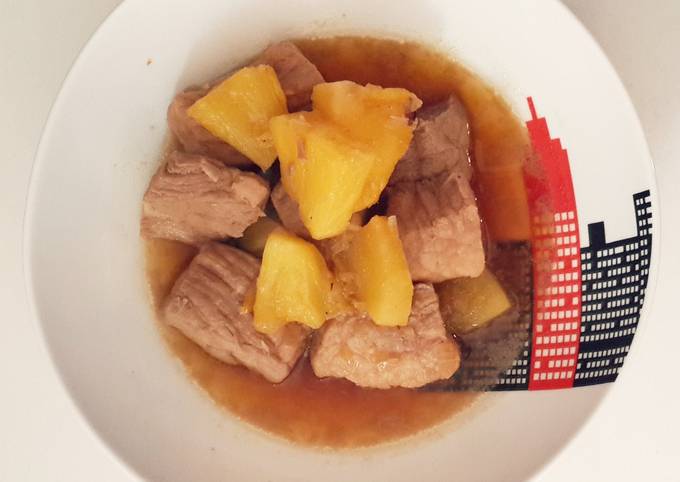
Vietnamese caramel pork with pineapple.

Vietnamese caramel pork with pineapple

Hey everyone, it's Drew, welcome to my recipe site. Today, I'm gonna show you how to prepare a distinctive dish, vietnamese caramel pork with pineapple. It is one of my favorites food recipes. This time, I'm gonna make it a bit unique. This will be really delicious.

Vietnamese caramel pork with pineapple is one of the most well liked of current trending foods in the world. It is easy, it's fast, it tastes delicious. It's enjoyed by millions every day. They are nice and they look wonderful. Vietnamese caramel pork with pineapple is something that I have loved my entire life.

To get started with this particular recipe, we have to prepare a few components. You can cook vietnamese caramel pork with pineapple using 9 ingredients and 5 steps. Here is how you cook that.

The ingredients needed to make Vietnamese caramel pork with pineapple:

  1. {Make ready of pork belly or pork shoulder cut into cubes.
  2. {Make ready of pineapple cut into cubes.
  3. {Take of shallot chopped.
  4. {Take of fish sauce.
  5. {Take of vietnamese caramel sauce.
  6. {Prepare of salt.
  7. {Make ready of sugar.
  8. {Take of oil.
  9. {Make ready of ground black pepper.

Instructions to make Vietnamese caramel pork with pineapple:

  1. Mix pork with fish sauce, caramel sauce, salt, sugar, 1/2 of chopped shallot and peppercorn and leave for about 20 mins. Pork wilk be golden brown because of caramel sauce, it looks very tasty!.
  2. After 15 mins, heat the sauce pot with oil (high-medium heat) then add the rest of chopped shallot and stir it until translucent..
  3. Add pork and stir it until coated then add a small bowl of water, simmer with low heat for 15-20 mins without cover..
  4. Add pineapple and stir with pork. Simmer for 10 mins..
  5. Taste the sauce and add more salt or sugar if you want. Serve with rice in a deep serving dish. Bon appétit!.

So that is going to wrap this up with this exceptional food vietnamese caramel pork with pineapple recipe. Thanks so much for your time. I'm sure you will make this at home. There is gonna be interesting food in home recipes coming up. Don't forget to save this page in your browser, and share it to your family, colleague and friends. Thank you for reading. Go on get cooking!

Steps to Make Quick 3- Layer Strawberry Naked Drip Cake from scratch

Steps to Make Quick 3- Layer Strawberry Naked Drip Cake from scratch

3- Layer Strawberry Naked Drip Cake from scratch.

3- Layer Strawberry Naked Drip Cake from scratch

Hello everybody, it's Brad, welcome to our recipe site. Today, I will show you a way to make a distinctive dish, 3- layer strawberry naked drip cake from scratch. It is one of my favorites food recipes. This time, I will make it a bit tasty. This is gonna smell and look delicious.

3- Layer Strawberry Naked Drip Cake from scratch is one of the most favored of current trending foods on earth. It's simple, it's quick, it tastes yummy. It is enjoyed by millions every day. 3- Layer Strawberry Naked Drip Cake from scratch is something that I've loved my entire life. They are fine and they look wonderful.

To get started with this recipe, we must first prepare a few ingredients. You can cook 3- layer strawberry naked drip cake from scratch using 20 ingredients and 17 steps. Here is how you cook it.

The ingredients needed to make 3- Layer Strawberry Naked Drip Cake from scratch:

  1. {Get of Cake-----------------.
  2. {Take of softened butter salted.
  3. {Take of sugar.
  4. {Get of vanilla extract.
  5. {Prepare of fine all purpose flour +2 tablespoons.
  6. {Prepare of cornstarch.
  7. {Make ready of baking powder.
  8. {Get of salt.
  9. {Prepare of extra large eggs.
  10. {Prepare of lukewarm milk.
  11. {Get of vanilla bean.
  12. {Get of Icing--------------------.
  13. {Make ready of powdered sugar.
  14. {Get of milk.
  15. {Get of vanilla extract.
  16. {Get of butter soften.
  17. {Make ready of Filling and Topping------------.
  18. {Make ready of strawberries see my recipe putting up Strawberries.
  19. {Make ready of cornstarch.
  20. {Prepare of strawberry juice.

Steps to make 3- Layer Strawberry Naked Drip Cake from scratch:

  1. Preheat oven 350 degrees Fahrenheit.
  2. Grease three 9 inch cake pan. Or 3 heated greased cast iron skillets..
  3. Mix the flour, baking powder, cornstarch, and salt..
  4. Cream the butter, vanilla bean, vanilla extract, and sugar..
  5. Beat the eggs and milk and set aside..
  6. Mix all the ingredients incorporate very well..
  7. In the 3 pans add a laddle full of the batter, one at a time to make equal amounts till all the batter is used equally..
  8. Bake in oven for 20-25 minutes till done.
  9. Let cool completely..
  10. Take 1-1/2 quarts fresh strawberries and add to a pot bring to a simmer mix 1 tablespoon cornstarch and 1/4 cup water..
  11. Add cornstarch solution to the simmering strawberries. Stir till thickened..
  12. Let cool a bit. After it's cool to touch without being too hot, spread the strawberry mix over the bottom and the middle layers of cake. Just enough to cover the upper part of each layer..
  13. Stack the middle on the bottom. Add the top layer..
  14. Mix the 1/4 cup milk, 2 tablespoons butter, powdered sugar, and 1 teaspoon vanilla extract, mix till fluffy..
  15. Make a ring around the top edge of the top layer of cake with the icing and let it drip..
  16. Add the rest of the strawberries to the top layer within the ring around the top edge. Allow to drip over the edges..
  17. Serve I hope you enjoy!.

So that's going to wrap it up with this special food 3- layer strawberry naked drip cake from scratch recipe. Thanks so much for your time. I am confident you can make this at home. There's gonna be interesting food at home recipes coming up. Remember to save this page in your browser, and share it to your family, friends and colleague. Thanks again for reading. Go on get cooking!

Step-by-Step Guide to Make Favorite Summer Fruit Salad

Step-by-Step Guide to Make Favorite Summer Fruit Salad

Summer Fruit Salad.

Summer Fruit Salad

Hey everyone, I hope you're having an amazing day today. Today, I will show you a way to prepare a special dish, summer fruit salad. It is one of my favorites food recipes. For mine, I will make it a bit tasty. This is gonna smell and look delicious.

Summer Fruit Salad is one of the most popular of recent trending meals on earth. It's enjoyed by millions every day. It is easy, it is quick, it tastes delicious. They are nice and they look fantastic. Summer Fruit Salad is something that I've loved my entire life.

To begin with this particular recipe, we have to prepare a few ingredients. You can have summer fruit salad using 13 ingredients and 4 steps. Here is how you can achieve it.

The ingredients needed to make Summer Fruit Salad:

  1. {Make ready of Fruits.
  2. {Prepare 1 of Fuji Apple-cored.
  3. {Get 1 of Kiwi.
  4. {Take 1 cup of Strawberries.
  5. {Take 1 of Bannana.
  6. {Get 1 of Red Plum.
  7. {Take 1 cup of Red or Green Grapes.
  8. {Get of Dressing.
  9. {Get 1/4 cup of Berry Vinegar.
  10. {Prepare 1 tbsp of Strawberry Preserves.
  11. {Prepare 1 tbsp of Honey.
  12. {Take 1 tsp of Fresh Lemon Juice.
  13. {Get 1/2 tsp of Fresh Lime Juice.

Steps to make Summer Fruit Salad:

  1. Slice strawberries, grapes and bannana. Chop remaining fruits to bite size pieces and place in mixing bowl..
  2. Dressing: heat honey and preserves until thin enough to mix (10 sec in microwave). Combine to mix with lemon and lime juice and vinegar. Mix well and drizzle over fruit..
  3. Place in refrigerator for 2 hours to marinate..
  4. Stir before serving. Serve over mascarpone, yogurt or ice cream..

So that's going to wrap it up with this special food summer fruit salad recipe. Thanks so much for reading. I am confident you can make this at home. There's gonna be more interesting food in home recipes coming up. Don't forget to save this page in your browser, and share it to your family, friends and colleague. Thanks again for reading. Go on get cooking!

Recipe of Super Quick Homemade Garlic soup

Recipe of Super Quick Homemade Garlic soup

Garlic soup. Garlic soup is a type of soup using garlic as a main ingredient. In Spanish cuisine, sopa de ajo (soup of garlic) is a traditional garlic soup made with bread, egg poached in chicken broth and laced with garlic and sherry. In the Czech Republic, garlic soup is called česnečka.

Garlic soup Garlic, and Garlic, and More Garlic, Oh My! Our creamy garlic soup recipe calls for four heads of garlic—not cloves, heads. Now, before you worry that you're going to have to eat this soup in the.

Hello everybody, I hope you are having an amazing day today. Today, I will show you a way to prepare a distinctive dish, garlic soup. One of my favorites. This time, I am going to make it a little bit unique. This will be really delicious.

Garlic soup is a type of soup using garlic as a main ingredient. In Spanish cuisine, sopa de ajo (soup of garlic) is a traditional garlic soup made with bread, egg poached in chicken broth and laced with garlic and sherry. In the Czech Republic, garlic soup is called česnečka.

Garlic soup is one of the most well liked of recent trending meals on earth. It's enjoyed by millions daily. It's simple, it is fast, it tastes yummy. Garlic soup is something that I've loved my entire life. They are fine and they look fantastic.

To get started with this particular recipe, we have to first prepare a few ingredients. You can have garlic soup using 9 ingredients and 4 steps. Here is how you cook that.

The ingredients needed to make Garlic soup:

  1. {Prepare of garlic.
  2. {Get of stale bread.
  3. {Prepare of cured ham.
  4. {Make ready of eggs.
  5. {Prepare of Extra Virgin Olive Oil from Spain.
  6. {Get of paprika.
  7. {Get of chicken broth.
  8. {Get of Salt, to taste.
  9. {Take of Ground black pepper, to taste.

The garlic mellows as it simmers and works itself into something round and mild - not at all harsh or aggressive in flavor or fragrance. It's a restorative soup, one that I make when I want something. It's thickened with bread like the classic French version but quicker to make. This hearty garlic soup recipe takes all the health benefits of garlic to the next level.

Instructions to make Garlic soup:

  1. Pour the olive oil from Spain into the pot and heat until it starts to shimmer..
  2. Then add the garlic and sauté until it turns a golden color..
  3. Add the ham, paprika, and salt to taste..
  4. Add the bread, chicken broth, and the egg and cook until a creamy consistency..

Roasted garlic adds savory sweetness along with flavorful (and healthful) chicken broth, onions. I really enjoyed this quick garlic soup. By cooking the garlic for a long time the flavor mellows out instead of the strong garlic taste. This simple vegetarian soup bursts with garlic, both roasted and simmered. It's a satisfying, bold soup equally worthy of kicking off a fancy dinner party or completing a quiet.

So that is going to wrap this up with this exceptional food garlic soup recipe. Thank you very much for your time. I am confident that you can make this at home. There's gonna be more interesting food at home recipes coming up. Don't forget to save this page on your browser, and share it to your loved ones, colleague and friends. Thank you for reading. Go on get cooking!

Recipe of Ultimate Imitation Crab Salad Summer Rolls

Recipe of Ultimate Imitation Crab Salad Summer Rolls

Imitation Crab Salad Summer Rolls.

Imitation Crab Salad Summer Rolls

Hey everyone, it is John, welcome to our recipe page. Today, we're going to prepare a special dish, imitation crab salad summer rolls. One of my favorites. This time, I'm gonna make it a bit unique. This is gonna smell and look delicious.

Imitation Crab Salad Summer Rolls is one of the most popular of current trending meals in the world. It's enjoyed by millions every day. It's easy, it is quick, it tastes yummy. They're nice and they look fantastic. Imitation Crab Salad Summer Rolls is something which I've loved my whole life.

To begin with this particular recipe, we must prepare a few components. You can have imitation crab salad summer rolls using 7 ingredients and 11 steps. Here is how you cook it.

The ingredients needed to make Imitation Crab Salad Summer Rolls:

  1. {Take of Imitation crab sticks.
  2. {Prepare of Cucumber.
  3. {Prepare of leaves Lettuce.
  4. {Prepare of Cellophane noodles.
  5. {Take of Spring roll wrappers (rice paper wrappers).
  6. {Take of Dressing of your choice.
  7. {Prepare of See Multi-Purpose! Chinese-style Dressing.

Steps to make Imitation Crab Salad Summer Rolls:

  1. Julienne the cucumber. Soak the harusame noodles in boiling water for 5 minutes, and drain well. Shred the lettuce leaves to the same length as the crabsticks..
  2. I bought the rice paper wrappers at the Chinese section of the supermarket..
  3. Put lukewarm water into a large bowl, and soak the wrappers..
  4. They become soft in 1-2 minutes..
  5. Put lettuce, cucumber, harusame noodles and 2 crabsticks on a wrapper..
  6. Fold the near end of the wrapper over the fillings..
  7. Fold in both sides of the wrapper..
  8. Roll up as shown..
  9. Cut each roll in half, and they're done!.
  10. Serve with a dressing of your choice..
  11. You can also wrap shrimp, salmon, ham, steamed chicken, or whatever you like..

So that is going to wrap it up for this exceptional food imitation crab salad summer rolls recipe. Thank you very much for your time. I'm confident that you will make this at home. There is gonna be more interesting food in home recipes coming up. Don't forget to save this page on your browser, and share it to your loved ones, friends and colleague. Thanks again for reading. Go on get cooking!

Step-by-Step Guide to Make Quick Oil base vanilla cake recipe 👍🏻

Step-by-Step Guide to Make Quick Oil base vanilla cake recipe 👍🏻

Oil base vanilla cake recipe 👍🏻.

Oil base vanilla cake recipe 👍🏻

Hello everybody, hope you're having an amazing day today. Today, I will show you a way to make a special dish, oil base vanilla cake recipe 👍🏻. It is one of my favorites food recipes. For mine, I'm gonna make it a little bit tasty. This is gonna smell and look delicious.

Oil base vanilla cake recipe 👍🏻 is one of the most favored of current trending meals on earth. It is easy, it is quick, it tastes delicious. It is appreciated by millions every day. They're nice and they look fantastic. Oil base vanilla cake recipe 👍🏻 is something that I have loved my entire life.

To get started with this recipe, we have to prepare a few components. You can cook oil base vanilla cake recipe 👍🏻 using 11 ingredients and 17 steps. Here is how you cook it.

The ingredients needed to make Oil base vanilla cake recipe 👍🏻:

  1. {Take of Flour 2+1/2 cup.
  2. {Prepare of Sugar 1+1/8 cup(I used 1 cup am not a sugar fan I let the sugar in the icing do the job).
  3. {Take 1/4 cup of Milk powder.
  4. {Take 1 cup of Water.
  5. {Make ready 200 g of melted butter(1 cup).
  6. {Prepare 1 tbsp of white venegar.
  7. {Take 1 tsp of vanilla flavor.
  8. {Prepare 1 tsp of milk flavor.
  9. {Prepare 5 of eggs.
  10. {Take 1 tsp of baking soda.
  11. {Make ready 1/2 tbsp of Baking powder.

Instructions to make Oil base vanilla cake recipe 👍🏻:

  1. In a bowl Combine all your dry ingredients and mix except the milk. Oil base vanilla cake recipe 👍🏻
  2. Pour in your powdered milk into your 1 cup of water.
  3. Add the venegar and stir (that gives u butter milk) set aside.
  4. Wisk eggs with either fork, spoon or hand whisk fo just 10 sec and set aside.
  5. Now bring all your ingredients together. for this procedure you can either use a hand whisk or flat wooden turning stick/spatula.
  6. In a bigger bowl pour in your melted butter.
  7. Add both flavors and mix for (2 sec).
  8. Add in 1 quarter potion of your egg mixture.
  9. 1 quarter potion of your butter milk.
  10. 1 quarter potion of your dry ingredients and mix (6sec) repeat procedure 2 more times as you can’t pour in everything at once. (reason: I don’t know I forgot to ask my teacher👩🏾‍🍳 baking is science so I just do it but I’ll still ask her sha).
  11. Put on your oven and set to medium Heat.
  12. Butter coat your pan and dust with flour (an 8 inches pan or 2 6inches pans) you can add raisins or what ever to make two different flavors.
  13. Pour in your batter and your set to bake.in about 20 min set your oven to low heat ( if you’re using a gas oven but if electric leave at 180 degree for 30 mins.
  14. To know if your cake is ready use a fork or tooth pick to pierce the middle of your cake if there’s no cake stick to it then your yummy cake is set to leave the oven. Oil base vanilla cake recipe 👍🏻
  15. I hope these steps are useful to you. Thanks and I wish you a success.
  16. Don’t forget to like and follow. Also follow me on Instagram and Twitter @ tikdacooks_and_bakes.
  17. Next recipe will be chocolate cake and low cost red velvet cake.

So that is going to wrap it up for this special food oil base vanilla cake recipe 👍🏻 recipe. Thanks so much for your time. I'm sure that you can make this at home. There's gonna be more interesting food at home recipes coming up. Remember to save this page in your browser, and share it to your loved ones, colleague and friends. Thank you for reading. Go on get cooking!

Easiest Way to Prepare Perfect Vertical Layer Cake

Easiest Way to Prepare Perfect Vertical Layer Cake

Vertical Layer Cake.

Vertical Layer Cake

Hello everybody, I hope you are having an amazing day today. Today, I'm gonna show you how to prepare a distinctive dish, vertical layer cake. One of my favorites. This time, I will make it a bit tasty. This is gonna smell and look delicious.

Vertical Layer Cake is one of the most favored of recent trending meals in the world. It is enjoyed by millions every day. It is easy, it's quick, it tastes yummy. Vertical Layer Cake is something that I've loved my whole life. They're fine and they look wonderful.

To get started with this particular recipe, we must prepare a few ingredients. You can cook vertical layer cake using 25 ingredients and 44 steps. Here is how you cook it.

The ingredients needed to make Vertical Layer Cake:

  1. {Take of Vanilla For the Sponge -.
  2. {Make ready of eyes I close my and used third rd of this recipe.
  3. {Get of All purpose flour Sifted ..
  4. {Get of Baking powder ..
  5. {Get of Salt th ..
  6. {Prepare of unsalted butter softened ..
  7. {Get of Sugar ..
  8. {Get of egg large , at room temperature ..
  9. {Prepare of vanilla essence ..
  10. {Make ready of Milk at room temp ..
  11. {Make ready of Chocolate cake For the swiss roll -.
  12. {Prepare of You shall need : I used martha stweart ’ s recipe (doubled).
  13. {Make ready of cocoa powder.
  14. {Get of All purpose flour plus 4 tbsps.
  15. {Prepare of salt.
  16. {Make ready of eggs egg yolks large 4 large whole plus.
  17. {Prepare of sugar.
  18. {Prepare of unsalted butter , melted and cooled completely.
  19. {Make ready of Filling :.
  20. {Take of Cream cheese ….
  21. {Take of butter softened ….
  22. {Get of icing sugar ….
  23. {Make ready of corn flour ….
  24. {Get of few yellow color.
  25. {Make ready of Lime lemon jam and / preserve (Or you may use zest and juice of 2 limes and 2 s)….

Instructions to make Vertical Layer Cake:

  1. Pre heat  an oven to 170C..
  2. In a bowl, cream sugar and butter. Beat until pale..
  3. Add the egg and beat again..
  4. Add the vanilla essence..
  5. Sift all the dry ingriedients in a bowl and keep aside..
  6. Put half of the dry ingredients and beat in the butter sugar mix..
  7. Add half of the milk..
  8. Put the rest of the flour and mix..
  9. Add the milk and mix well..
  10. In a lined tin, pour the batter and bake for 15-20 min until a skewer when inserted in the center comes out clean..
  11. Keep it out on the cooling rack for 10 min and then unmould..
  12. Chocolate cake:.
  13. Pre heat the oven to 200 C and line two cake sheet trays with baking paper..
  14. Put a bowl of water to simmer, in a heatproof bowl add the eggs and sugar..
  15. Place this bowl on the simmering water (make use it does not touch the water).
  16. Using a whisk, amalgamate the sugar and eggs..
  17. Keep mixing them until the sugar is dissolved and the egg-sugar mix is warm to touch..
  18. Take it off the heat and using a beater, beat it for 4-5 min or until the mix is fluffy and pale..
  19. Sift the dry ingredients and fold carefully in the egg sugar mix..
  20. Pour the butter slowly at one of the edge and mix it carefully. We dont want to knock all the lovely air out..
  21. Divide the batter in the trays equally and bake each tray for 7-8 min or until the cake is springy to touch..
  22. Using a tea cloth/kitchen towel, invert the cake on it and peel off the butter sheet carefully..
  23. While the cakes are warm, roll them carefully in the cloth and keep aside until further use..
  24. Filling:.
  25. In a bowl, cream the cheese and butter..
  26. Add half of the sugar and cornflour..
  27. Add the jam/preserve..
  28. Add the balance dry ingredients and color..
  29. Beat until nice and fluffy (Adjust the lemony flavor.).
  30. Cover with cling film and keep aside until used..
  31. Make ganache with 1:1 ratio of semi sweet chocolate and cream..
  32. To Assemble-.
  33. Open the cakes and cut them length wise in half..
  34. Spread the filling forming a thin layer on the cake strips..
  35. Roll the first strip, filling side in as tightly as you may. be sure to not break it..
  36. Using a little frosting, attach next strip and roll it over the existing roll..
  37. By the end of all the strips, you must have a big roulade with you..
  38. Wrap it in the cling film and leave it chill overnight or atleast for 5 hours..
  39. Layer the vanilla cake in two..
  40. Spread a little ganache in it and put the roulade on it..
  41. Put another thin layer of ganache on the roulade's top and put the other vanilla layer..
  42. Seal the cake crumbs with the remaining frosting and put in the fridge for 30 min. (The heat was terrible for cream cheese frosting :() You may try any other frostinf of your choice..
  43. Pour ganache on the cake once the cake has rested in the fridge..
  44. Let the ganache set, decorate as you please..

So that is going to wrap this up with this exceptional food vertical layer cake recipe. Thank you very much for reading. I am confident that you can make this at home. There's gonna be interesting food at home recipes coming up. Don't forget to save this page on your browser, and share it to your family, friends and colleague. Thanks again for reading. Go on get cooking!

Simple Way to Make Award-winning White Wine Garlic Alfredo Sauce

Simple Way to Make Award-winning White Wine Garlic Alfredo Sauce

White Wine Garlic Alfredo Sauce. Slowly mix in white wine while stirring, then add salt and pepper to taste. Flavorful, insanely delicious alfredo pasta with white wine, garlic white sauce, and roasted Brussels sprouts. Garlic and white wine, which are infused into a classic white sauce paired with al dente pasta and roasted Brussels Sprouts.

White Wine Garlic Alfredo Sauce I always bought the Alfredo sauce in the jar at the grocery store. I made this sauce and it is a revelation. This alfredo sauce is a delicious combination of shallots, garlic, white wine and cream blended together in a thick mixture.

Hello everybody, it is Drew, welcome to my recipe site. Today, we're going to make a distinctive dish, white wine garlic alfredo sauce. It is one of my favorites. For mine, I will make it a bit tasty. This will be really delicious.

Slowly mix in white wine while stirring, then add salt and pepper to taste. Flavorful, insanely delicious alfredo pasta with white wine, garlic white sauce, and roasted Brussels sprouts. Garlic and white wine, which are infused into a classic white sauce paired with al dente pasta and roasted Brussels Sprouts.

White Wine Garlic Alfredo Sauce is one of the most well liked of recent trending meals on earth. It is appreciated by millions every day. It's simple, it is quick, it tastes delicious. White Wine Garlic Alfredo Sauce is something which I have loved my entire life. They're fine and they look wonderful.

To begin with this particular recipe, we must first prepare a few ingredients. You can have white wine garlic alfredo sauce using 6 ingredients and 6 steps. Here is how you can achieve that.

The ingredients needed to make White Wine Garlic Alfredo Sauce:

  1. {Take of Heavy Whipping Cream.
  2. {Make ready of grated or shredded parmesan cheese.
  3. {Get of white wine (Barefoot Chardonnay is what I use).
  4. {Make ready of garlic.
  5. {Get of salt and pepper.
  6. {Make ready of sautéed mushrooms (optional).

Don't even bother wasting your time making the usual boring alfredo!! Try this sauce and you'll never go back. The flavors are amazing and will impress any guest. Alfredo Sauce with Wine Wine and Garlic.

Steps to make White Wine Garlic Alfredo Sauce:

  1. In medium sauce pan heat heavy whipping cream over medium heat, stirring occasionally. (DO NOT LET BOIL) Depending on your stove heat for 5-15 minutes..
  2. Add pressed garlic..
  3. Slowly add parmesan cheese, stirring constantly..
  4. Slowly add white wine, still constantly stirring. Salt and pepper to taste, and add mushrooms..
  5. Reduce heat, stir until thickened..
  6. I add about 1 lb of chicken to mine, and serve over fettuccine..

This easy pasta recipe is perfect for busy weeknights! A creamy white wine sauce, al dente fettuccine noodles, parmesan cheese, and simple sautéed shrimp make a hearty and filling meal - and it's lightened up with no heavy cream in sight!.a cheesy garlic alfredo sauce made with coconut milk, fresh garlic and vegan butter for a crazily rich, crazily delicious sauce and some added nutritional Vegan Butter: We chose to go with vegan butter for making the sauce to really get that super rich alfredo thing going on. Vegan alfredo sauce is always a good idea. This recipe goes one step further as it's made with a splash of dry white wine and some lemon juice. Cook onions and garlic in a skillet with vegetable broth and some dry white wine to soften them up.

So that is going to wrap it up for this exceptional food white wine garlic alfredo sauce recipe. Thanks so much for your time. I'm sure you will make this at home. There's gonna be more interesting food in home recipes coming up. Remember to bookmark this page in your browser, and share it to your loved ones, friends and colleague. Thank you for reading. Go on get cooking!

Step-by-Step Guide to Make Ultimate Packed With the Flavors of Iwate! A
Not-Deep-Fried Spring Roll Bento

Step-by-Step Guide to Make Ultimate Packed With the Flavors of Iwate! A Not-Deep-Fried Spring Roll Bento

Packed With the Flavors of Iwate! A Not-Deep-Fried Spring Roll Bento.

Packed With the Flavors of Iwate! A Not-Deep-Fried Spring Roll Bento

Hey everyone, I hope you are having an amazing day today. Today, I will show you a way to prepare a special dish, packed with the flavors of iwate! a not-deep-fried spring roll bento. One of my favorites food recipes. For mine, I will make it a bit tasty. This will be really delicious.

Packed With the Flavors of Iwate! A Not-Deep-Fried Spring Roll Bento is one of the most favored of current trending meals in the world. It's appreciated by millions every day. It's simple, it's quick, it tastes delicious. Packed With the Flavors of Iwate! A Not-Deep-Fried Spring Roll Bento is something which I've loved my whole life. They are nice and they look wonderful.

To begin with this recipe, we have to first prepare a few components. You can cook packed with the flavors of iwate! a not-deep-fried spring roll bento using 10 ingredients and 6 steps. Here is how you can achieve it.

The ingredients needed to make Packed With the Flavors of Iwate! A Not-Deep-Fried Spring Roll Bento:

  1. {Get of For the not-deep fried spring rolls with salmon gratin filling.
  2. {Make ready of Fall salmon filet.
  3. {Prepare of Spring roll wrappers (small).
  4. {Make ready of Spinach.
  5. {Take of Shimeji mushrooms.
  6. {Get of Butter (for sauteing).
  7. {Get of enough to cover the bottom of the frying pan Vegetable oil.
  8. {Make ready of Katakuriko slurry (to seal the spring rolls).
  9. {Get of Bechamel (white) sauce.
  10. {Take of Kan-koji (or shio-koji with a little sugar).

Steps to make Packed With the Flavors of Iwate! A Not-Deep-Fried Spring Roll Bento:

  1. Remove the skin and bones off the salmon and cut into bite sized pieces. Put it into a plastic bag with the kan-koji or shio-koji and sugar. Press the air out of the bag, and leave to marinate for 10 minutes..
  2. Add the butter for sauteing to a pan, and turn the heat on to medium (IH 3). Add the salmon with the koji to the pan and cook through. Cut the spinach and shimeji mushrooms into bite sized pieces..
  3. Add the spinach and mushrooms to the pan and saute quickly. Transfer to a bowl. Wash the pan, add the oil, heat, and turn the heat off..
  4. Mix the cooked salmon mixture from Step 3 with the bechamel sauce, and wrap with the spring roll wrappers. Put the spring rolls in the heated oil, and coat with the oil..
  5. Preheat the oven to 480F/250C. Line up the oil-covered spring rolls on a rack and bake for 10-15 minutes..
  6. Since they are oven-baked, the spring rolls stay crispy even if they sit for a while. Plus you don't have oil spitting all over the place, so cleanup is easy!.

So that's going to wrap this up with this exceptional food packed with the flavors of iwate! a not-deep-fried spring roll bento recipe. Thanks so much for your time. I'm sure you will make this at home. There's gonna be more interesting food at home recipes coming up. Remember to bookmark this page in your browser, and share it to your family, colleague and friends. Thanks again for reading. Go on get cooking!

Steps to Make Super Quick Homemade Chicken curry with potato and
peas(chicken Aalu Matar) #mycookbook

Steps to Make Super Quick Homemade Chicken curry with potato and peas(chicken Aalu Matar) #mycookbook

Chicken curry with potato and peas(chicken Aalu Matar) #mycookbook.

Chicken curry with potato and peas(chicken Aalu Matar) #mycookbook

Hey everyone, it is John, welcome to our recipe site. Today, I'm gonna show you how to prepare a special dish, chicken curry with potato and peas(chicken aalu matar) #mycookbook. One of my favorites. This time, I'm gonna make it a little bit unique. This will be really delicious.

Chicken curry with potato and peas(chicken Aalu Matar) #mycookbook is one of the most well liked of current trending foods on earth. It's simple, it is quick, it tastes yummy. It's enjoyed by millions daily. Chicken curry with potato and peas(chicken Aalu Matar) #mycookbook is something that I have loved my entire life. They are nice and they look fantastic.

To get started with this recipe, we must first prepare a few ingredients. You can cook chicken curry with potato and peas(chicken aalu matar) #mycookbook using 10 ingredients and 4 steps. Here is how you can achieve that.

The ingredients needed to make Chicken curry with potato and peas(chicken Aalu Matar) #mycookbook:

  1. {Prepare 1 kg of chicken,1 big potato, 1/2 cup peas.
  2. {Get of (1 sliced onion,3 cloves, 4 cardamom, 1stick cinnamon,.
  3. {Make ready 8 of black pepper and 2 bay leaf).
  4. {Make ready 1/2 cup of oil,1 1/2 tbsn salt,1 tsp garam masala powder and.
  5. {Make ready of Few coriander leaves chopped.
  6. {Take of Masala to grind.
  7. {Get of (1 onion medium, 1 tomato(medium,1 pod garlic,.
  8. {Get 1 inch of ginger and 7 green chillies (acc to u)1 tbsn Kashmiri red.
  9. {Get of Powder,1 tbsn coriander powder)grind all this.
  10. {Get 1 tsp of turmeric powder.

Steps to make Chicken curry with potato and peas(chicken Aalu Matar) #mycookbook:

  1. First heat oil in a vessel.then add the onion with whole garam masala (pic2) when onions brown add the above grind masala and mix.now simmer till oil floats up..
  2. Now add the turmeric and salt.
  3. Now saute 2 mins and add the potatoes and peas.mix well.cover the lid and cook 10 mins slow flame.
  4. When done add the garam masala powder and few chopped coriander leaves. Serve hot with rice,chapati, tortilla and enjoy 😊 #newyoutuber.

So that is going to wrap it up with this special food chicken curry with potato and peas(chicken aalu matar) #mycookbook recipe. Thank you very much for reading. I'm confident you will make this at home. There is gonna be interesting food at home recipes coming up. Remember to save this page on your browser, and share it to your family, colleague and friends. Thank you for reading. Go on get cooking!

Recipe of Speedy Fruit salad

Recipe of Speedy Fruit salad

Fruit salad. Fruit salad is a dish consisting of various kinds of fruit, sometimes served in a liquid, either their own juices or a syrup. In different forms, fruit salad can be served as an appetizer, a side salad, or a dessert. Provides Delicious Fruit Salad Recipes and cooking tips.

Fruit salad Whip up a fresh fruit salad for breakfast or as a light dessert with yogurt or cream. Look for ripe, sweet-smelling fruit for this simple fruit salad with kiwi, mango, pineapple, grapes, orange and berries. Serve fruit salad inside hollowed-out fruit for a dish that doubles as a centerpiece.

Hello everybody, I hope you are having an incredible day today. Today, I will show you a way to prepare a special dish, fruit salad. One of my favorites food recipes. This time, I am going to make it a little bit unique. This will be really delicious.

Fruit salad is one of the most well liked of current trending foods in the world. It's simple, it's fast, it tastes yummy. It's appreciated by millions every day. They're fine and they look wonderful. Fruit salad is something which I have loved my whole life.

Fruit salad is a dish consisting of various kinds of fruit, sometimes served in a liquid, either their own juices or a syrup. In different forms, fruit salad can be served as an appetizer, a side salad, or a dessert. Provides Delicious Fruit Salad Recipes and cooking tips.

To get started with this particular recipe, we have to first prepare a few components. You can cook fruit salad using 17 ingredients and 6 steps. Here is how you cook it.

The ingredients needed to make Fruit salad:

  1. {Take of fruit.
  2. {Prepare 1/2 large of coconut.
  3. {Get 1/2 large of pineapple.
  4. {Make ready 2 large of peaches.
  5. {Get 1 pinch of salt.
  6. {Take of nuts.
  7. {Prepare 1 cup of walnuts.
  8. {Take 1/2 cup of almonds.
  9. {Make ready 1/2 cup of pistachio nuts, salted.
  10. {Make ready 1/3 cup of cashew nuts.
  11. {Get of dressing.
  12. {Prepare 14 1/2 oz of coconut milk.
  13. {Get 1/4 tsp of ground cinnamon.
  14. {Take 1 tsp of vanilla extract.
  15. {Take 1 tsp of dried mint leaves.
  16. {Take of topping.
  17. {Take 1/2 tsp of unsweet extra dark Hershey cocoa powder.

Not to mention, one less bowl to clean later. Get the recipe from The Cookie Rookie ». These fantastic fruit salad recipes include peach-and-fennel slaw, spicy green mangoes and caramelized watermelon. Easy Fruit Salad Recipe with sour cream and marshmallows.

Instructions to make Fruit salad:

  1. Mix the coconut milk, crumbled mint, cinnamon, and vanilla extract. Set aside. And chill in refrigerator..
  2. If you use fresh peel and slice the pineapple. Crack the coconut and take out the fruit, its hard to remove from the shell I also drained the coconut water. I left the skin on the peaches..
  3. Rinse and dry the coconut fruit. Toast the coconut.
  4. Shave half a cup of the coconut. Grate half a cup and leave some in chunks. Cut the pineapple and peaches into bite sized pieces. Add salt. Mix all these fruits together..
  5. Toast the walnuts, cashews, almonds and pistachios. Mix the nuts with the fruit..
  6. Add the dressing to the salad. Sprinkle the coca powder on top. Serve hope you enjoy! I chilled my dressing overnight.

A great winter fruit salad since you can use fruit from cans and not have to stress about getting fresh fruit. Fresh fruit is colorful and nutritious. Thrown into a fruit salad, it becomes the perfect take-along dish for parties, picnics and potlucks. Creamy White Chocolate and Coconut Milk Fruit Salad CookingwithK. This refreshing fruit salad can be made in advance and won't oxidise and go brown.

So that's going to wrap it up for this exceptional food fruit salad recipe. Thank you very much for reading. I'm sure you will make this at home. There's gonna be more interesting food in home recipes coming up. Remember to save this page in your browser, and share it to your family, friends and colleague. Thank you for reading. Go on get cooking!

Step-by-Step Guide to Prepare Homemade TimTam cake

Step-by-Step Guide to Prepare Homemade TimTam cake

TimTam cake.

TimTam cake

Hello everybody, hope you're having an amazing day today. Today, I will show you a way to make a distinctive dish, timtam cake. One of my favorites. This time, I will make it a little bit tasty. This is gonna smell and look delicious.

TimTam cake is one of the most favored of current trending foods in the world. It is simple, it's fast, it tastes delicious. It is enjoyed by millions daily. They're fine and they look fantastic. TimTam cake is something which I've loved my whole life.

To begin with this recipe, we have to prepare a few components. You can cook timtam cake using 11 ingredients and 9 steps. Here is how you can achieve it.

The ingredients needed to make TimTam cake:

  1. {Make ready 1 1/3 cup of plain flour.
  2. {Make ready 2 tbsp of cocoa.
  3. {Make ready 1 tsp of baking powder.
  4. {Get 1/2 tsp of bi carb soda.
  5. {Get 200 grams of cooking chocolate.
  6. {Get 225 grams of unsalted butter.
  7. {Make ready 1 cup of caster sugar.
  8. {Get 1 tsp of vanilla extract.
  9. {Prepare 4 of eggs.
  10. {Make ready 1/2 cup of milk.
  11. {Prepare 1 of Nuttella.

Steps to make TimTam cake:

  1. pre heat oven to 160ºc. Grease and line a 24 cm pan..
  2. sift flour, cocoa, baking powder and bi carb soda into a bowl..
  3. melt the chocolate in a heatproof bowl set over a pan of barely simmering water, cool slightly..
  4. beat butter and sugar with an electric mixer until light and fluffy. Add vanilla, then eggs 1 at a time, beating well after each addition. Pour in cooled chocolate and beat until combined. Beat in a third of sifted ingredients and then milk, repeat until all ingredients are smooth..
  5. pour mixture into the pan and bake for 45-55 minutes until risen. Cool on a rack..
  6. Once cooled the cake can be split in half so that nutella can be spread between..
  7. Melt cooking chocolate in microwave until fully melted. Spread the melted cooking chocolate on top of the cake. (Allow melted chocolate to drip down sides.).
  8. Place in fridge till chocolate is set..
  9. Take the cake out of the fridge to enjoy your delicious TimTam cake! :).

So that is going to wrap this up with this special food timtam cake recipe. Thank you very much for your time. I am sure that you can make this at home. There is gonna be interesting food in home recipes coming up. Don't forget to bookmark this page on your browser, and share it to your loved ones, colleague and friends. Thanks again for reading. Go on get cooking!

Step-by-Step Guide to Prepare Any-night-of-the-week My juicy curry
noodles

Step-by-Step Guide to Prepare Any-night-of-the-week My juicy curry noodles

My juicy curry noodles. When I tell people that I am a food blogger, one of the most common follow up questions is, "What's your favorite food to cook?" One of my favorite dishes to cook at home is this one-pot curry noodles. It is a Thai-inspired dish made with red curry paste, which you can find in the. Singapore noodles - The rice noodles are tossed in a curry sauce with shrimp, BBQ pork, onions, and peppers.

My juicy curry noodles These healthy vegan red curry noodle bowls are flavorful, saucy and super easy to make! Served with vegetables, crispy tofu, and gluten-free noodles too! Curry Noodle Soup with Popcorn ChickenOmnivore's Cookbook.

Hello everybody, hope you're having an incredible day today. Today, I will show you a way to prepare a distinctive dish, my juicy curry noodles. One of my favorites food recipes. For mine, I am going to make it a little bit unique. This is gonna smell and look delicious.

My juicy curry noodles is one of the most favored of current trending meals on earth. It is easy, it is quick, it tastes yummy. It's enjoyed by millions every day. They are nice and they look wonderful. My juicy curry noodles is something which I've loved my whole life.

When I tell people that I am a food blogger, one of the most common follow up questions is, "What's your favorite food to cook?" One of my favorite dishes to cook at home is this one-pot curry noodles. It is a Thai-inspired dish made with red curry paste, which you can find in the. Singapore noodles - The rice noodles are tossed in a curry sauce with shrimp, BBQ pork, onions, and peppers.

To begin with this particular recipe, we must first prepare a few ingredients. You can cook my juicy curry noodles using 5 ingredients and 2 steps. Here is how you cook it.

The ingredients needed to make My juicy curry noodles:

  1. {Take 1 pack of noodle(super pack).
  2. {Take 2 of simply chopped small garlic and 1 medium onion,grinded pepper.
  3. {Take 1/2 tsp of curry powder and thyme,then Indomie seasonings.
  4. {Prepare of Soy sauce (optional),1 and 1/3 cup of boiled water.
  5. {Take of Already grilled chicken.

Spice up your mid-week with this deliciously fragrant Thai prawn curry noodles broth, packed with soft rice noodles and juicy prawns. Using a handy jar of curry paste, zesty lime, rich fish sauce and creamy coconut milk you can achieve an authentic taste in minutes with this recipe. These Bangkok Coconut Curry Noodle Bowls with brown rice noodles are healthy and easy - can be made vegetarian, vegan, or gluten free! Download Curry noodles stock photos at the best stock photography agency with millions of premium high quality, royalty-free stock photos, images and pictures at reasonable prices.

Steps to make My juicy curry noodles:

  1. Place cooking pan on heat and sprinkle veg oil,stir fry chopped garlic,onions and regularly keep stiring with wooden spoon.Sprinkle on the curry,thyme until the onions slightly start to soften for 2mins.Add boiled water,grinded pepper and deeped noodles,cook for 3mins then add your indomie seasonings,soy sauce and keep cooking for some mins,remove pan off fire with small juicy liquid then toss grilled chicken inside and allow to settle,then serve warm..
  2. Looking soo yummy and lush to eat😍,.

This creamy noodle dish is topped with crunchy cashew nuts for added flavour and texture. It's a simple vegan supper, perfect for feeding the family. Yes, you can have Thai takeout right at home! This soup is packed with so much flavor with bites of tender chicken, rice noodles, cilantro, basil and lime juice! Now you know I love a red curry.

So that's going to wrap it up with this exceptional food my juicy curry noodles recipe. Thanks so much for your time. I am sure that you will make this at home. There's gonna be more interesting food at home recipes coming up. Don't forget to bookmark this page in your browser, and share it to your family, colleague and friends. Thank you for reading. Go on get cooking!

How to Make Favorite Pomegranate Blueberry Salad

How to Make Favorite Pomegranate Blueberry Salad

Pomegranate Blueberry Salad.

Pomegranate Blueberry Salad

Hey everyone, it's Jim, welcome to my recipe site. Today, I will show you a way to prepare a distinctive dish, pomegranate blueberry salad. It is one of my favorites food recipes. This time, I will make it a bit unique. This is gonna smell and look delicious.

Pomegranate Blueberry Salad is one of the most favored of recent trending foods on earth. It's easy, it's fast, it tastes yummy. It's appreciated by millions daily. Pomegranate Blueberry Salad is something that I've loved my entire life. They're nice and they look fantastic.

To get started with this recipe, we have to first prepare a few ingredients. You can cook pomegranate blueberry salad using 7 ingredients and 4 steps. Here is how you can achieve it.

The ingredients needed to make Pomegranate Blueberry Salad:

  1. {Make ready 50 grams of Lettuce.
  2. {Make ready 40 grams of arugula.
  3. {Get 1/2 of pomegranate.
  4. {Take 1/4 cup of blueberries, halved.
  5. {Prepare 4 of cherry tomatoes, quartered.
  6. {Make ready 1 of carrot, grated.
  7. {Make ready 1/4 cup of cucumber, sliced.

Instructions to make Pomegranate Blueberry Salad:

  1. Chop up lettuce and place at the bottom of the bowl..
  2. Chop up arugula and place on top of the lettuce. Gr.
  3. Grate carrot and place next to arugula. Cut up the cherry tomatoes and do the same..
  4. Cut pomegranate in half and take the seeds out. Place over everything in the bowl. Cut the blueberries and do the same. Serve with salt and pepper.

So that's going to wrap it up for this exceptional food pomegranate blueberry salad recipe. Thanks so much for reading. I'm confident you can make this at home. There is gonna be more interesting food in home recipes coming up. Remember to bookmark this page in your browser, and share it to your family, friends and colleague. Thank you for reading. Go on get cooking!

Recipe of Favorite Chinese-Style Simmered Chicken Wings and Daikon
Radish with Star Anise In a Pressure Cooker

Recipe of Favorite Chinese-Style Simmered Chicken Wings and Daikon Radish with Star Anise In a Pressure Cooker

Chinese-Style Simmered Chicken Wings and Daikon Radish with Star Anise In a Pressure Cooker.

Chinese-Style Simmered Chicken Wings and Daikon Radish with Star Anise In a Pressure Cooker

Hello everybody, hope you're having an amazing day today. Today, I will show you a way to prepare a distinctive dish, chinese-style simmered chicken wings and daikon radish with star anise in a pressure cooker. It is one of my favorites food recipes. This time, I will make it a little bit tasty. This will be really delicious.

Chinese-Style Simmered Chicken Wings and Daikon Radish with Star Anise In a Pressure Cooker is one of the most well liked of recent trending foods on earth. It is easy, it is quick, it tastes delicious. It's enjoyed by millions daily. They're nice and they look wonderful. Chinese-Style Simmered Chicken Wings and Daikon Radish with Star Anise In a Pressure Cooker is something which I have loved my entire life.

To begin with this particular recipe, we must prepare a few ingredients. You can cook chinese-style simmered chicken wings and daikon radish with star anise in a pressure cooker using 11 ingredients and 5 steps. Here is how you can achieve that.

The ingredients needed to make Chinese-Style Simmered Chicken Wings and Daikon Radish with Star Anise In a Pressure Cooker:

  1. {Take 7 of Chicken wings - the mid-section and the tip.
  2. {Make ready 3/4 of Daikon radish (cut into 3 cm wide pieces).
  3. {Get 1 tsp of Weipa.
  4. {Make ready 1 tsp of Chicken soup stock granules.
  5. {Prepare 2 tbsp of Soy sauce.
  6. {Prepare 100 ml of Sake.
  7. {Prepare 1 of Star anise.
  8. {Prepare 1/2 tsp of Sichuan pepper.
  9. {Get 1/2 tsp of Thin round slices of red chili pepper.
  10. {Take 1 of thumb Ginger.
  11. {Make ready 1 clove of Garlic.

Instructions to make Chinese-Style Simmered Chicken Wings and Daikon Radish with Star Anise In a Pressure Cooker:

  1. Brown the surfaces of the chicken wings in a non-stick frying pan. No need for oil..
  2. Add all the ingredients and enough water to cover them into a pressure cooker. Cook for about 10 minutes over medium heat. Leave until the pressure drops..
  3. Open the lid, and taste it. Simmer for a few minutes, and done The chicken wings will be so tender, and daikon radish will have a nice flavour..
  4. I cooked with chicken drumettes and boiled eggs this time..
  5. I use the leftover daikon radish skin for "Daikon Radish Skin and Carrot Kinpira". https://cookpad.com/us/recipes/153413-daikon-radish-skin-and-carrot-kinpira.

So that is going to wrap it up for this exceptional food chinese-style simmered chicken wings and daikon radish with star anise in a pressure cooker recipe. Thank you very much for reading. I'm confident that you can make this at home. There's gonna be more interesting food in home recipes coming up. Don't forget to save this page in your browser, and share it to your loved ones, colleague and friends. Thank you for reading. Go on get cooking!

Recipe of Super Quick Homemade Brownie Recipe

Recipe of Super Quick Homemade Brownie Recipe

Brownie Recipe.

Brownie Recipe

Hello everybody, it is John, welcome to my recipe page. Today, I'm gonna show you how to make a distinctive dish, brownie recipe. It is one of my favorites food recipes. This time, I'm gonna make it a little bit tasty. This is gonna smell and look delicious.

Brownie Recipe is one of the most favored of current trending foods in the world. It's enjoyed by millions daily. It's easy, it is quick, it tastes yummy. Brownie Recipe is something which I've loved my entire life. They're nice and they look wonderful.

To get started with this recipe, we must prepare a few components. You can cook brownie recipe using 10 ingredients and 8 steps. Here is how you cook that.

The ingredients needed to make Brownie Recipe:

  1. {Prepare of butter.
  2. {Make ready of sugar.
  3. {Take of cocoa.
  4. {Get of vanilla.
  5. {Make ready of eggs.
  6. {Get of flour.
  7. {Prepare of baking powder.
  8. {Get of raspberries (optional).
  9. {Make ready of white chocolate (optional).
  10. {Take of icing sugar (optional).

Instructions to make Brownie Recipe:

  1. Melt butter on medium heat..
  2. Add sugar and cocoa and stir..
  3. Add vanilla, then eggs one by one. Stir quickly and well so you don't get scrabled eggs..
  4. Fold in flour and baking powder..
  5. Put mixture into greased tray or muffin tins..
  6. Drop a piece of white chocolate and/or a raspberry into the batter..
  7. Bake for 20-25min at 180'C..
  8. Cut into squares and dust with icing sugar..

So that's going to wrap this up for this special food brownie recipe recipe. Thanks so much for your time. I am sure that you can make this at home. There is gonna be interesting food at home recipes coming up. Remember to bookmark this page on your browser, and share it to your loved ones, friends and colleague. Thank you for reading. Go on get cooking!

Recipe of Perfect Chicken curry sauce

Recipe of Perfect Chicken curry sauce

Chicken curry sauce. Nigerian Chicken curry sauce: How to cook Chicken curry sauce for Rice or Pasta, a NIGERIAN CURRY SAUCE RECIPE. Also a Chicken curry sauce recipe delicious. Hi guys! in today's video I will be showing you how to make a tasty Chicken curry sauce,Enjoy the recipe and don't forget to subscribe for more tasty.

Chicken curry sauce In this family-friendly chicken curry dish, thinly sliced chicken breasts are sautéed with curry powder and simmered in an aromatic, slightly sweet curry sauce thickened with Greek yogurt. And Japanese chicken curry is quite popular for all generations in Japan and it's widely available in many The consistency of Japanese curry sauce is much thicker and the taste is on the sweeter side. Nigeria is full of curry sauce recipes, each one unique and delicious.

Hello everybody, hope you're having an amazing day today. Today, I'm gonna show you how to make a special dish, chicken curry sauce. One of my favorites food recipes. This time, I'm gonna make it a little bit tasty. This will be really delicious.

Chicken curry sauce is one of the most well liked of current trending foods on earth. It is simple, it's fast, it tastes yummy. It is enjoyed by millions daily. They're nice and they look wonderful. Chicken curry sauce is something which I have loved my entire life.

Nigerian Chicken curry sauce: How to cook Chicken curry sauce for Rice or Pasta, a NIGERIAN CURRY SAUCE RECIPE. Also a Chicken curry sauce recipe delicious. Hi guys! in today's video I will be showing you how to make a tasty Chicken curry sauce,Enjoy the recipe and don't forget to subscribe for more tasty.

To begin with this recipe, we have to first prepare a few components. You can cook chicken curry sauce using 16 ingredients and 11 steps. Here is how you can achieve it.

The ingredients needed to make Chicken curry sauce:

  1. {Get 1 kg of Chicken.
  2. {Make ready 2 cups of mixed vegetables (chopped carrots, green pepper etc).
  3. {Get 1-2 of scotch bonnet peppers (chopped).
  4. {Get 2 stalks of spring onions.
  5. {Prepare 1 of medium-sized onion (chopped).
  6. {Make ready 3 tbsp. of corn flour/plain flour/corn starch OR 3 large potatoe.
  7. {Prepare 3 cloves of garlic, (minced).
  8. {Make ready 1 tbsp. of Ginger (minced).
  9. {Prepare 3 of stock cubes (chicken flavor).
  10. {Get 1 tbsp. of curry powder.
  11. {Prepare 1 tsp. of thyme.
  12. {Make ready 1 1/2 tsp of garlic powder.
  13. {Prepare 1/2 tbsp. of vegetable oil for frying.
  14. {Take 1 pinch of turmeric for colour.
  15. {Get 1 pinch of sesame seeds to garnish.
  16. {Make ready of salt, pepper and extra chicken seasoning (to taste).

Almost every cook has their own method of how to make curry sauce or how to make chicken sauce. Our way of how to prepare. This easy skillet chicken is flavored with a creamy sauce made with curry powder, garlic, and some dry white wine. Serve this great tasting chicken with rice and a favorite vegetable for a fabulous.

Steps to make Chicken curry sauce:

  1. Cut chicken into your desired sizeable chunks, then wash and season it with half of the curry powder and chicken seasoning, one teaspoon of garlic powder, as well as with all of the thyme and ginger. Add some salt there, too. Marinate the chicken and ingredients for an hour or more before cooking (if you have the time).
  2. Grab your chopped and mixed vegetables(carrots, green pepper, green peas, green beans and cabbage) and season them with one of the stock cubes, the rest of your garlic powder and a tiny pinch of curry. Set them aside to marinate for half an hour..
  3. After marinating place the chicken in a large pot, cover it with water, add half of your chopped onion, some salt and pepper, as well as the rest of your flavour cubes and curry. Place the pot on the medium heat and let it cook.
  4. While the chicken is cooking, put a frying pan on a separate burner and heat up your vegetable oil on medium heat. When it is hot, add the rest of your onion and the minced garlic. Sauté those until your kitchen fills with their delicious smell. Then, add your vegetables (including scotch bonnet peppers), sauté the whole thing for a few more minutes and turn off the burner.
  5. If you decided to use corn flour/plain flour/corn starch for thickening, it is time to add water to it and mix them together until they are nice and smooth. Alternatively, if you are using potatoes, boil them, mash them and add water..
  6. Check on your chicken. If it is soft, take it out of the stock, place the cooked vegetables in the stock and mix them together. Give it a little taste and add more seasoning if needed..
  7. Add your corn flour/plain flour/corn starch/potato puree to the sauce. Add it gradually so that you can control how thick your sauce is. Mix it all together..
  8. Put the chicken back in the sauce and give it a stir. Add the turmeric to make the colours of the sauce pop.
  9. As most of the ingredients are now thoroughly cooked, turn the heat off (if you have an electrical stove) and let the sauce simmer for a few minutes. If you have gas, leave it on the lowest flame possible for up to three minutes.
  10. Our sauce is ready! Serve with couscous, pasta, potatoes, or rice. Use the sesame seeds to garnishY.
  11. Please note☝️For this recipe, it is best to use chicken legs or filet cut into medium-sized chunks. As for the vegetables, you can use green, yellow and red bell peppers, green beans, cabbage and carrots. You can either buy pre-cut and/or frozen veggies or go an extra mile and get the fresh ingredients. The amount of scotch bonnet peppers depends on how spicy you want your curry to be..

Chicken Katsu Curry is an absolute favourite - traditionally hailing from Japan, this dish compromises of panko breadcrumb coated chicken in a thick curry sauce and rice. Learn how to make the best with basic pantry staples. The flavors in this basil chicken in coconut curry sauce are subtle yet blended perfectly. This quick and easy chicken curry is creamy, full of flavour and takes less than half an hour! This easy staple chicken curry is a fantastic recipe for family dinners.

So that's going to wrap this up for this exceptional food chicken curry sauce recipe. Thanks so much for reading. I'm confident you will make this at home. There is gonna be interesting food in home recipes coming up. Don't forget to save this page on your browser, and share it to your loved ones, colleague and friends. Thanks again for reading. Go on get cooking!

Step-by-Step Guide to Prepare Speedy Mike's EZ Seafood Alfredo &
Roasted Garlic Spread Dinner

Step-by-Step Guide to Prepare Speedy Mike's EZ Seafood Alfredo & Roasted Garlic Spread Dinner

Mike's EZ Seafood Alfredo & Roasted Garlic Spread Dinner.

Mike's EZ Seafood Alfredo & Roasted Garlic Spread Dinner

Hey everyone, I hope you are having an amazing day today. Today, we're going to prepare a distinctive dish, mike's ez seafood alfredo & roasted garlic spread dinner. One of my favorites food recipes. For mine, I'm gonna make it a little bit unique. This is gonna smell and look delicious.

Mike's EZ Seafood Alfredo & Roasted Garlic Spread Dinner is one of the most popular of recent trending meals on earth. It's appreciated by millions daily. It is simple, it is fast, it tastes delicious. Mike's EZ Seafood Alfredo & Roasted Garlic Spread Dinner is something that I've loved my whole life. They're nice and they look wonderful.

To begin with this particular recipe, we must prepare a few components. You can have mike's ez seafood alfredo & roasted garlic spread dinner using 28 ingredients and 15 steps. Here is how you cook it.

The ingredients needed to make Mike's EZ Seafood Alfredo & Roasted Garlic Spread Dinner:

  1. {Take of ● For The EZ Roasted Garlic Spread.
  2. {Make ready 1 Pound of Fresh Garlic Cloves [left whole].
  3. {Take 2 tbsp of Quality Olive Oil.
  4. {Make ready 4 tbsp of Sun Dried Tomatoes [in oil].
  5. {Make ready 1/4 tsp of Rosemary [heaping].
  6. {Make ready 1/4 tsp of Thyme [heaping].
  7. {Get 1/4 tsp of Dried Parsley [heaping].
  8. {Make ready 1/4 tsp of Fresh Ground Black Pepper [heaping].
  9. {Make ready 1/4 tsp of Salt [or less to taste].
  10. {Prepare to taste of Granulated Sugar.
  11. {Get 2 of Large Sheets Tinfoil.
  12. {Get of ● For The EZ Bread.
  13. {Make ready 1 of Large Baguette Bread Loaf [to be baked at home - marketside makes a great one].
  14. {Prepare of ● For The EZ Seafood.
  15. {Get 1 (12 oz) of Bag Pre-Steamed Shrimp [de-shelled - de-thawed - de-veined - tails left on].
  16. {Prepare 1 (16 oz) of Box Presteamed Frozen Clams.
  17. {Take of ● For The EZ Alfredo Sauce.
  18. {Prepare 2 (15 oz) of Jars Bertolli Garlic Alfredo Sauce [one garlic alfredo - one regular alfredo].
  19. {Take 1/4 Cup of Shreaded Parmasean Cheese [+ reserves for garnish].
  20. {Prepare 1 Cup of Sliced Mushrooms.
  21. {Get 1 Splash of Chardonnay.
  22. {Prepare 1/4 tsp of Fresh Ground Black Pepper.
  23. {Take as needed of Fresh Parsley [garnish].
  24. {Get of ● For The Noodles.
  25. {Prepare 1 Box of Linguine Noodles.
  26. {Prepare 1 of needed Quality Olive Oil [to coat noodles].
  27. {Take of ● For The Garnishments.
  28. {Make ready as needed of Fresh Parsley.

Instructions to make Mike's EZ Seafood Alfredo & Roasted Garlic Spread Dinner:

  1. ● For The Seafood De-thaw shrimp in sink. Leave clams in freezer until ready to serve. Private Reserves or out a great steamed clam. Available at Costco and Sams Club..
  2. Start by making your roasted garlic by mixing everything together in double lined tinfoil. Mix up well..
  3. Seal garlic up tightly. In a preheated 400° oven - bake for 30 minutes..
  4. At the same time, bake your bread as per manufactures directions [usually 7 to 10 minutes at 400°] then cover bread with a towel until you're ready to slice and serve..
  5. Once roasted - using forks or a potato masher - mash garlic mixture well. Taste test to see if you'd like to add additional herbs or salt. If you feel it's too salty - no worries. Just add additional sun dried tomatoes..
  6. Serve garlic spread warm or room temp in small individual Ramikins for your guests..
  7. Roasted garlic and baguettes presented by one of my 7 year old students..
  8. Alfredo Sauce ingredients. Mushrooms not pictured..
  9. Add 2 tbsp of your roasted garlic mixture and bring all sauce ingredients to a simmer. Simmer for 10 minutes..
  10. At the same time - begin your noodle water boil with salt and a dash of olive oil. Boil as per manufactures directions. Usually 12 minutes..
  11. In the last 3 minutes of your 10 minute Alfredo simmer - put in your shrimp. You're only wanting to warm them since they're already pre -steamed..
  12. Drain pasta and lightly coat noodles with olive oil..
  13. Heat clams in microwave as per manufactures directions. Usually 3 to 5 minutes. Place any residual juices from that steam in your pasta and mix..
  14. This was a submission by one of my 7 year old students who really wanted to try clams but couldn't stand the thought of touching their shells. [?] So, the clams are all internal in this photo and out of shell. Yup. He wouldn't touch a single one. [smh].
  15. Plate you pasta. Ladle on your seafood Alfredo Sauce. Top dish with whole steamed clams. Garnish with parmasean cheese and fresh parsley. Serve with roasted garlic spread and fresh warmed bread to the side. Also, pair your dish with a quality Chardonnay. Enjoy!.

So that is going to wrap it up with this special food mike's ez seafood alfredo & roasted garlic spread dinner recipe. Thanks so much for reading. I'm confident you will make this at home. There's gonna be interesting food in home recipes coming up. Don't forget to bookmark this page on your browser, and share it to your loved ones, friends and colleague. Thank you for reading. Go on get cooking!

Steps to Make Homemade Mike's Jerk Chicken - Spicy Beans/Rice & Fried
Plantains

Steps to Make Homemade Mike's Jerk Chicken - Spicy Beans/Rice & Fried Plantains

Mike's Jerk Chicken - Spicy Beans/Rice & Fried Plantains.

Mike's Jerk Chicken - Spicy Beans/Rice & Fried Plantains

Hey everyone, it is Louise, welcome to our recipe page. Today, we're going to prepare a special dish, mike's jerk chicken - spicy beans/rice & fried plantains. One of my favorites. For mine, I will make it a little bit tasty. This is gonna smell and look delicious.

Mike's Jerk Chicken - Spicy Beans/Rice & Fried Plantains is one of the most well liked of current trending foods on earth. It is simple, it's quick, it tastes delicious. It's appreciated by millions daily. They're nice and they look wonderful. Mike's Jerk Chicken - Spicy Beans/Rice & Fried Plantains is something which I've loved my entire life.

To get started with this particular recipe, we have to first prepare a few ingredients. You can cook mike's jerk chicken - spicy beans/rice & fried plantains using 1 ingredients and 17 steps. Here is how you cook that.

The ingredients needed to make Mike's Jerk Chicken - Spicy Beans/Rice & Fried Plantains:

  1. {Take of My apologies for the inconvenience. This new app isn't allowing me to itemize or edit ingredients on this site tonight. So, you'll have to scroll down for instructions.

Instructions to make Mike's Jerk Chicken - Spicy Beans/Rice & Fried Plantains:

  1. First - Jerk Chicken Dish - The EASY way. ● Open 2 10 oz jars Traditional Jerk Seasoning. ● WALKERSWOOD TRADITIONAL makes a great Jamaican Jerk seasoning and, has all the fantastic flavors I remember from my visit there. ● If you can't find that specific brand - here's a quick Chefs tip. Jarred Jamaican Jerk Seasoning is one of those few culinary items where the most expensive - is usually the best. So look for the $6.00+ per bottle range..
  2. FOR YOUR EASY CHICKEN PURÉE ● Purée these ingredients in a blender. 1 bunch scallions, chopped 1 large onion, roughly chop 2 scotch bonnet peppers [habeneros will work as well - optional] 1/4 cup chicken broth 1/2 tsp dried thyme 10 garlic cloves 1/8 cup lime juice ● Mix this simple purée to your 2 10 oz bottles of jarred jerk seasoning..
  3. Rinse 8 pieces of bone in chicken and pat dry. Your choice of cut. I typically use thighs. Skin on. They tend to lend more fat and flavor..
  4. Marinate chicken in your jerk seasoning and purée mixture in a large zip lock bag for 2+ hours. Or, even overnight if possible..
  5. ● Bake chicken plus marinade at 400° for 1 hour. Following that, peirce your thickest piece of chicken with a knife. If the juices run clear, they're done. If not, bake a bit longer. ● Pull from oven and char chicken on a heated BBQ grill until there's a nice cross hatch char on each piece. ● Side note: Since both of my grills were completely frozen shut, I couldn't grill my chicken tonight. Just try to visualize them with a glorious, delectable, solid cross cut char on them. ;0) ● I would eventually be forced to fry them on high with a minimal amount of high heat oil to achieve a decent char. Then, I drained them on paper towels. I also fried in 4 piece batches..
  6. Charred thighs draining on paper towels..
  7. FOR THE EASY SPICY RICE & BEANS 5 cups microwavable brown or white rice. Or, use both. [i'll usually mix it up with a cup of uncle bens microwavable red beans and rice] 1 cup firm kidney beans [drained] 1 splash frying oil 2/3 cup chicken broth [you may need a bit more] 3/4 cup white onions [small chop] 2 cloves garlic [minced] 1 tsp Tony Chachere's Seasoning Fresh cracked black pepper to taste 1 Scotch Bonnet or Habenero pepper [fine minced or leave whole and pull after frying - it'll still leave behind the heat and flavor] 1 splash coconut milk ● Fry/sweat everything [except for beans, rice and broth] together until opaque or, translucent. About 4 minutes. Be careful not to burn your garlic though. Stir regularly. ● Add your rice, beans and broth and fry covered until both are fully heated and rice has absorbed the fluid. Stir regularly..
  8. FOR THE EASY FAUX PLANTAINS [since plantains are somewhat harder to find] 4 extremely firm bananas [cut into 1/2" slices at an angle] High heat cooking Oil Fresh Lime Wedges [as needed] ● Heat oil on high. Then, fry bananas in oil on medium high until golden brown. ● Drain on paper towels and generously drizzle bananas with lime juice..
  9. That's it. Easy peasy! ● Consider serving this dish on sizzling cast iron skillets..
  10. Definitely pair this dish with ice cold Red Stripe Beer. Together, they're always a refreshing and delicious duo!.
  11. Second recipe - Jerk Chicken Dish - The HARD way. But, It's far more more traditional. FOR THE CHICKEN 8 pieces of chicken - bone in - your choice of cut. Rinse chicken and pat dry..
  12. FOR THE JERK CHICKEN SEASONINGS ● Toast seasonings in pan then, fine grind these ingredients. 1/2 of 1 nutmeg 1 cinnamon stick 1 tablespoon coriander seeds 1 teaspoon cloves, whole 1/2 tsp allspice 1 teaspoon black peppercorns.
  13. FOR THE JERK CHICKEN PURÉE ● Purée these ingredients in a blender. 1 bunch scallions, chopped 1 large onion, roughly chop 2 scotch bonnet peppers 3/4 tsp dried thyme 10 garlic cloves ● Add both your toasted / ground spices and purée to a bowl. Then, hand stir in the following ingredients. 1/4 cup fresh lime juice [or more to taste] 1/2 cup soy sauce [or more to taste] 1/4 cup raw sugar [or more to taste].
  14. FOR THE BEANS AND RICE 2 tbs vegetable oil 1/2 yellow onion, chopped 4 garlic cloves, chopped 2 cups long-grain rice 1 teaspoon salt 1 teaspoon grated fresh ginger 1 cup water 1 cup chicken stock 2 cups coconut milk 1 15-ounce can kidney beans, rinsed and drained 2 teaspoons dried thyme 1 whole scotch bonnet chile (can substitute a whole habanero) Lime juice [to taste].
  15. TO COOK THE RICE ● Heat the oil in a medium pot over medium-high heat. Add the onions and sauté for 4-5 minutes, until they begin to brown on the edges. ● Add the garlic and rice, stir well and cook for another 2-3 minutes, stirring often. ● Add the grated ginger, salt, water, stock and coconut milk and stir well. Add the kidney beans and sprinkle the thyme over everything. Add the whole Scotch bonnet chile. Bring to a simmer, then turn the heat to low and cover. ● The rice should be done in about 15-20 minutes, depending on the type of rice you are using. Check after 15 minutes. Once done, remove from heat and cover for 10 minutes. To serve, fluff with a fork. Sprinkle with a little lime juice if you want. Discard the habanero..
  16. FOR THE PLANTAINS 4 plantains [cut into 1/2" slices] as needed Cooking Oil fresh lime wedges ● Fry Plantains in oil until golden brown. Drain on paper towels and lightly drizzle with lime juice..
  17. Enjoy!.

So that's going to wrap this up for this exceptional food mike's jerk chicken - spicy beans/rice & fried plantains recipe. Thanks so much for reading. I'm sure you can make this at home. There's gonna be more interesting food at home recipes coming up. Don't forget to save this page on your browser, and share it to your loved ones, colleague and friends. Thanks again for reading. Go on get cooking!

Recipe of Ultimate Brenda's Peanut butter Oreo Brownies

Recipe of Ultimate Brenda's Peanut butter Oreo Brownies

Brenda's Peanut butter Oreo Brownies.

Brenda's Peanut butter Oreo Brownies

Hello everybody, it is Louise, welcome to our recipe site. Today, I'm gonna show you how to make a special dish, brenda's peanut butter oreo brownies. It is one of my favorites food recipes. This time, I'm gonna make it a bit tasty. This will be really delicious.

Brenda's Peanut butter Oreo Brownies is one of the most favored of current trending foods in the world. It's easy, it's quick, it tastes delicious. It is enjoyed by millions daily. Brenda's Peanut butter Oreo Brownies is something which I've loved my whole life. They are fine and they look wonderful.

To begin with this particular recipe, we must prepare a few components. You can cook brenda's peanut butter oreo brownies using 6 ingredients and 5 steps. Here is how you cook it.

The ingredients needed to make Brenda's Peanut butter Oreo Brownies:

  1. {Get of brownie mix.
  2. {Take of oil.
  3. {Take of eggs.
  4. {Get of water.
  5. {Take of peanut butter.
  6. {Take of oreos.

Instructions to make Brenda's Peanut butter Oreo Brownies:

  1. Preheat oven to 325°..
  2. Mix brownies according to the box.
  3. Place 1 tablespoon of brownie mixture into muffin cup..
  4. Peanut Butter one side of an Oreo and place in muffin cup peanut butter side down place another teaspoon of peanut butter on top and smooth down then cover with another spoonful of brownie mixture..
  5. Bake for about 25 minutes or until a toothpick comes out clean..

So that's going to wrap it up with this exceptional food brenda's peanut butter oreo brownies recipe. Thanks so much for your time. I am confident that you will make this at home. There's gonna be interesting food at home recipes coming up. Remember to bookmark this page on your browser, and share it to your loved ones, colleague and friends. Thank you for reading. Go on get cooking!

Step-by-Step Guide to Make Perfect American style Jerk chicken

Step-by-Step Guide to Make Perfect American style Jerk chicken

American style Jerk chicken. The best Jamaican Jerk Chicken including oven and grilling instructions! It's incredibly flavorful thanks to hours of marinating in a vibrant and deliciously seasoned marinade. And who can resist that light char and crave-able spicy kick?

American style Jerk chicken Find jerk chicken stock images in HD and millions of other royalty-free stock photos, illustrations and vectors in the Shutterstock collection. Thousands of new, high-quality pictures added every day. Combine remaining ingredients in a blender or food processor and grind to a coarse paste.

Hello everybody, it is me again, Dan, welcome to my recipe site. Today, we're going to make a special dish, american style jerk chicken. It is one of my favorites food recipes. For mine, I'm gonna make it a little bit tasty. This will be really delicious.

American style Jerk chicken is one of the most well liked of current trending foods in the world. It's appreciated by millions daily. It's simple, it's fast, it tastes yummy. American style Jerk chicken is something that I've loved my entire life. They're nice and they look wonderful.

The best Jamaican Jerk Chicken including oven and grilling instructions! It's incredibly flavorful thanks to hours of marinating in a vibrant and deliciously seasoned marinade. And who can resist that light char and crave-able spicy kick?

To get started with this recipe, we must prepare a few ingredients. You can have american style jerk chicken using 4 ingredients and 6 steps. Here is how you can achieve that.

The ingredients needed to make American style Jerk chicken:

  1. {Take 1 1/2 lb of chicken.
  2. {Make ready 2 cup of Jerk marinade.
  3. {Make ready 1 dash of salt.
  4. {Take 1 dash of pepper.

This jerk chicken recipe is from Paul Chung, who grew up in Jamaica and sampled jerk throughout the island. It's fragrant, fiery hot and smoky all at once. For maximum flavor, let the chicken marinate overnight. Score chicken and season with salt.

Steps to make American style Jerk chicken:

  1. preheat oven to 350.
  2. In a mixing bowl, place chicken wings or legs into bowl.
  3. add salt, pepper and jerk marinade.
  4. Mix into the chicken..
  5. allow chicken to marinate in the fridge for an hour.
  6. after, place in pan you prefer and cook until well done.

Spoon desired amount of jerk marinade over chicken and rub into scores. A Draper family friend from Haiti inspired this version of Caribbean jerk-style chicken. The chicken marinates quickly and is loaded with flavor. Andi Oliver's jerk chicken and cornmeal waffles is next level. Summer parties can only be improved by a big platter of jerk chicken.

So that is going to wrap it up for this special food american style jerk chicken recipe. Thanks so much for your time. I am sure that you can make this at home. There's gonna be interesting food at home recipes coming up. Don't forget to bookmark this page in your browser, and share it to your loved ones, colleague and friends. Thank you for reading. Go on get cooking!

How to Prepare Any-night-of-the-week Super Easy No-bake Cheesecake

How to Prepare Any-night-of-the-week Super Easy No-bake Cheesecake

Super Easy No-bake Cheesecake.

Super Easy No-bake Cheesecake

Hello everybody, hope you are having an amazing day today. Today, we're going to make a distinctive dish, super easy no-bake cheesecake. One of my favorites food recipes. This time, I will make it a little bit tasty. This is gonna smell and look delicious.

Super Easy No-bake Cheesecake is one of the most well liked of recent trending foods on earth. It is enjoyed by millions every day. It's simple, it is quick, it tastes delicious. Super Easy No-bake Cheesecake is something that I have loved my entire life. They are fine and they look wonderful.

To begin with this recipe, we have to first prepare a few ingredients. You can have super easy no-bake cheesecake using 10 ingredients and 7 steps. Here is how you can achieve that.

The ingredients needed to make Super Easy No-bake Cheesecake:

  1. {Prepare of Base.
  2. {Prepare 125 g of Sweet Biscuits *made into fine crumbles.
  3. {Prepare 60 g of Butter.
  4. {Get of *Note: Very dry low-fat biscuits might need more moisture. Add 1-2 tablespoons Cream or Milk.
  5. {Take of Filling.
  6. {Make ready 250 g of Cream Cheese *softened.
  7. {Take 1 tablespoon of Lemon Juice.
  8. {Take 1/2 cup of Icing Sugar *OR 1/4 cup Caster Sugar.
  9. {Prepare 1 cup (250 ml) of Thickened Cream OR Heavy Cream *whipped.
  10. {Prepare of *Note: For this recipe, DO NOT use fat-reduced or light type products.

Steps to make Super Easy No-bake Cheesecake:

  1. For the base, mix finely crumbled Biscuit and melted Butter until moist crumbs. If too dry, add 1-2 tablespoons Cream or Milk..
  2. Line the base of the tin with baking paper, place the crumbs into the cake tin and press firmly over the base. Set aside in the fridge while you are preparing the filling..
  3. Whip Cream until soft peaks form..
  4. In a separate bowl, combine softened Cream Cheese, Sugar and Lemon Juice until smooth. Gradually add the whipped Cream and combine well..
  5. Pour the filling over the base. Place the tin in the fridge to chill for at least 3 hours or until completely set..
  6. Gently run a sharp knife around the inside edge of the tin to release the sides of the Cheesecake, then transfer to a serving plate..
  7. Decorate the cake with fresh Fruit of your choice. *Note: Today I used Mango and Grapes..

So that is going to wrap it up with this exceptional food super easy no-bake cheesecake recipe. Thanks so much for your time. I am confident that you will make this at home. There is gonna be interesting food at home recipes coming up. Remember to save this page in your browser, and share it to your family, friends and colleague. Thanks again for reading. Go on get cooking!

Steps to Prepare Any-night-of-the-week Spaghetti Squash Chicken Alfredo

Steps to Prepare Any-night-of-the-week Spaghetti Squash Chicken Alfredo

Spaghetti Squash Chicken Alfredo.

Spaghetti Squash Chicken Alfredo

Hello everybody, hope you are having an incredible day today. Today, we're going to make a distinctive dish, spaghetti squash chicken alfredo. One of my favorites food recipes. For mine, I'm gonna make it a bit unique. This is gonna smell and look delicious.

Spaghetti Squash Chicken Alfredo is one of the most well liked of current trending meals on earth. It's appreciated by millions every day. It's simple, it's fast, it tastes delicious. Spaghetti Squash Chicken Alfredo is something which I've loved my entire life. They're fine and they look fantastic.

To begin with this particular recipe, we must first prepare a few ingredients. You can have spaghetti squash chicken alfredo using 10 ingredients and 2 steps. Here is how you can achieve that.

The ingredients needed to make Spaghetti Squash Chicken Alfredo:

  1. {Make ready 2 of Spaghetti Squash.
  2. {Make ready 1/2 Cup of Water.
  3. {Get 2 of Grilled Skinned and Deboned Chicken Breasts, cut into cubes.
  4. {Make ready 1 Jar of Garlic Parmesan Sauce.
  5. {Make ready 1/2 Cup of Grated Parmesan Cheese.
  6. {Make ready 1 Can of Sweet Peas, drained.
  7. {Get 1 Tbsp. of Garlic Powder.
  8. {Get 1 Tbsp. of Onion Powder.
  9. {Get 1 Tbsp. of Old Bay Seasoning.
  10. {Take to taste of Salt and Pepper,.

Instructions to make Spaghetti Squash Chicken Alfredo:

  1. Wash dirt off squashes. Score squashes like u do a Baked Potato before cooking it. Add to Crock Pot. Pour in water. Cook on High 4 hours. Remove from crock pot an slice in half. Remove seeds and shredded pulp with a fork (look like tiny spaghetti noodles). Dump water out of crock pot and add the shredded squash back into the crock pot. Add rest of ingredients. Stir to combine and turn pot onto Low n heat til heated through. Stir n turn crock pot down to keep warm. Serve and Enjoy 😊.
  2. ***I serve this with Jumbo Butter Biscuits and sprinkle a little bit more grated Parmesan cheese on top.****.

So that's going to wrap it up for this special food spaghetti squash chicken alfredo recipe. Thanks so much for reading. I'm sure you can make this at home. There is gonna be more interesting food in home recipes coming up. Remember to bookmark this page in your browser, and share it to your family, friends and colleague. Thank you for reading. Go on get cooking!

Steps to Prepare Quick Simple Tomato Cucumber Salad with Lemon Dressing

Steps to Prepare Quick Simple Tomato Cucumber Salad with Lemon Dressing

Simple Tomato Cucumber Salad with Lemon Dressing.

Simple Tomato Cucumber Salad with Lemon Dressing

Hello everybody, hope you're having an amazing day today. Today, I will show you a way to make a special dish, simple tomato cucumber salad with lemon dressing. One of my favorites food recipes. This time, I will make it a bit unique. This will be really delicious.

Simple Tomato Cucumber Salad with Lemon Dressing is one of the most popular of current trending meals on earth. It's simple, it's fast, it tastes delicious. It is appreciated by millions daily. Simple Tomato Cucumber Salad with Lemon Dressing is something that I have loved my entire life. They're nice and they look fantastic.

To begin with this particular recipe, we have to prepare a few components. You can have simple tomato cucumber salad with lemon dressing using 9 ingredients and 2 steps. Here is how you can achieve it.

The ingredients needed to make Simple Tomato Cucumber Salad with Lemon Dressing:

  1. {Prepare 3 cups of grape or cherry tomatoes, halved.
  2. {Make ready 1.5 cups of sliced cucumber (about 1/8-inch thick slices) I recommend Persian/Lebanese or Kirby Cucumbers.
  3. {Take 1/2 of a small mild onion, very thinly sliced. If onions are hot, slice and put in a cold water bath for 5 mins and drain well.
  4. {Prepare 2-3 Tablespoons of finely chopped parsley (I use the stems as well.).
  5. {Get of the zest of half a lemon.
  6. {Prepare 2 Tablespoons of fresh lemon juice.
  7. {Take 1/2-1 teaspoon of sugar.
  8. {Prepare 3/4 teaspoon of kosher salt to start (you can adjust up later).
  9. {Get 2 Tablespoons of olive oil.

Steps to make Simple Tomato Cucumber Salad with Lemon Dressing:

  1. Gently toss all ingredients together in a large mixing bowl until salad is evenly and thoroughly dressed. If possible, let it sit for about 10 minutes to absorb flavors before serving..
  2. Enjoy! :).

So that's going to wrap this up for this exceptional food simple tomato cucumber salad with lemon dressing recipe. Thanks so much for reading. I'm confident you will make this at home. There is gonna be more interesting food in home recipes coming up. Remember to bookmark this page on your browser, and share it to your family, friends and colleague. Thanks again for reading. Go on get cooking!

Steps to Prepare Super Quick Homemade Buffalo wings

Steps to Prepare Super Quick Homemade Buffalo wings

Buffalo wings. Buffalo Wild Wings to you is the ultimate place to get together with your friends. A Buffalo wing in American cuisine, is an unbreaded chicken wing section (flat or drumette) that is generally deep-fried and then coated or dipped in a sauce consisting of a vinegar-based cayenne. Крылышки Буффало — традиционная закуска американской кухни. Куриные крылья жарят во фритюре и окунают в острый соус из уксуса. First off, both methods--broiling and frying--make delicious wings!

Buffalo wings See actions taken by the people who manage and post content. BUFFALO WILD WINGS, INC. is responsible for this Page. These baked buffalo wings are ultra crispy chicken wings tossed in a classic spicy sauce and served with ranch dressing.

Hello everybody, hope you are having an amazing day today. Today, I'm gonna show you how to prepare a special dish, buffalo wings. One of my favorites. This time, I'm gonna make it a little bit unique. This will be really delicious.

Buffalo wings is one of the most well liked of current trending meals on earth. It is appreciated by millions every day. It is easy, it's quick, it tastes yummy. Buffalo wings is something which I've loved my entire life. They are nice and they look wonderful.

Buffalo Wild Wings to you is the ultimate place to get together with your friends. A Buffalo wing in American cuisine, is an unbreaded chicken wing section (flat or drumette) that is generally deep-fried and then coated or dipped in a sauce consisting of a vinegar-based cayenne. Крылышки Буффало — традиционная закуска американской кухни. Куриные крылья жарят во фритюре и окунают в острый соус из уксуса. First off, both methods--broiling and frying--make delicious wings!

To get started with this particular recipe, we have to first prepare a few ingredients. You can cook buffalo wings using 10 ingredients and 3 steps. Here is how you can achieve that.

The ingredients needed to make Buffalo wings:

  1. {Prepare of all-purpose flour.
  2. {Get of paprika.
  3. {Get of cayenne pepper.
  4. {Prepare of salt.
  5. {Get of chicken wings.
  6. {Make ready of oil for deep frying.
  7. {Make ready of butter.
  8. {Take of hot sauce.
  9. {Make ready of ground black pepper.
  10. {Take of garlic powder.

The great thing about the internet is that there are loads of How to make Ultra Crispy Buffalo Wings in the Oven. The Buffalo chicken wing can be considered a true All-American blue collar dish. Buffalo natives will tell you, there is really only one way to eat a Buffalo Chicken Wing - and mild and medium are not an. I really love Buffalo Wild Wings (a buffalo wing restaurant & bar)!!

Steps to make Buffalo wings:

  1. In a small bowl mix together the flour, paprika, cayenne pepper and salt. Place chicken wings in a large nonporous glass dish or bowl and sprinkle flour mixture over them until they are evenly coated. Cover dish or bowl and refrigerate for 60 to 90 minutes..
  2. Heat oil in a deep fryer to 375 degrees F (190 degrees C). The oil should be just enough to cover wings entirely, an inch or so deep. Combine the butter, hot sauce, pepper and garlic powder in a small saucepan over low heat. Stir together and heat until butter is melted and mixture is well blended. Remove from heat and reserve for serving..
  3. Fry coated wings in hot oil for 10 to 15 minutes, or until parts of wings begin to turn brown. Remove from heat, place wings in serving bowl, add hot sauce mixture and stir together. Serve..

I don't have one near me unfortunately but whenever I am in a city that has one I always stock up on their spicy sauces!! The best buffalo wings are a perfect mix of crispy, tender, and saucy, and this recipe does it all. After coating the wings in cornstarch, you cover them in a spicy, flavorful batter before quickly frying them. Buffalo Wings - perfectly crispy buffalo chicken wings tossed in a classic spicy sauce served with ranch dressing and celery for the ultimate game day and party snack favorite. Today, buffalo wings can be found in every sports bar, at barbecues, and at almost every Super Bowl party in the USA. Последние твиты от Buffalo Wild Wings (@BWWings).

So that is going to wrap it up for this special food buffalo wings recipe. Thank you very much for reading. I'm sure that you can make this at home. There's gonna be more interesting food in home recipes coming up. Don't forget to save this page on your browser, and share it to your family, friends and colleague. Thank you for reading. Go on get cooking!